Skip to content
Tomash GHz
Creative Tinkering
Home
About Me
My name is Tomash, currently a Computer Science student at the University of Nicosia, Cyprus. I am a technology enthusiast, passionate rock climber and a dreamer. My dream is to blalbalbababal. Neque porro quisquam est qui dolorem ipsum quia dolor sit amet, consectetur, adipisci velit. “When I let go of what I am, I become what I might be.” – Lao Tzu
Projects
Lorem ipsum dolor sit amet, consectetur adipiscing elit. Suspendisse in fringilla justo. Nulla facilisis, lorem vel pharetra pulvinar, leo est mattis mi, eget molestie erat velit vitae lacus. Nullam ac nisi dolor. Maecenas quis odio turpis, a cursus libero. Nulla egestas, magna eget pulvinar iaculis, enim nulla pulvinar orci, eget dignissim mi dui dignissim odio. Nulla fringilla, nisi nec aliquam tempus, magna magna commodo felis, eu porttitor diam tortor et ligula. Maecenas odio turpis, interdum nec lacinia non, scelerisque quis neque. Vestibulum lacinia rutrum porta. Praesent vel augue vitae neque porttitor aliquam sed vitae enim. Sed interdum luctus viverra. Nulla facilisi. Maecenas tristique vestibulum sagittis. Morbi eros nibh, laoreet vitae sollicitudin id, blandit sit amet turpis. Sed nunc neque, malesuada nec fringilla sit amet, rhoncus eget nibh. Aenean vitae leo odio. Donec ut vehicula libero. Nulla facilisi. Morbi quis eros magna, eget egestas tellus.
Controllers
Visuals
Art
Workshops
Digital Warrior
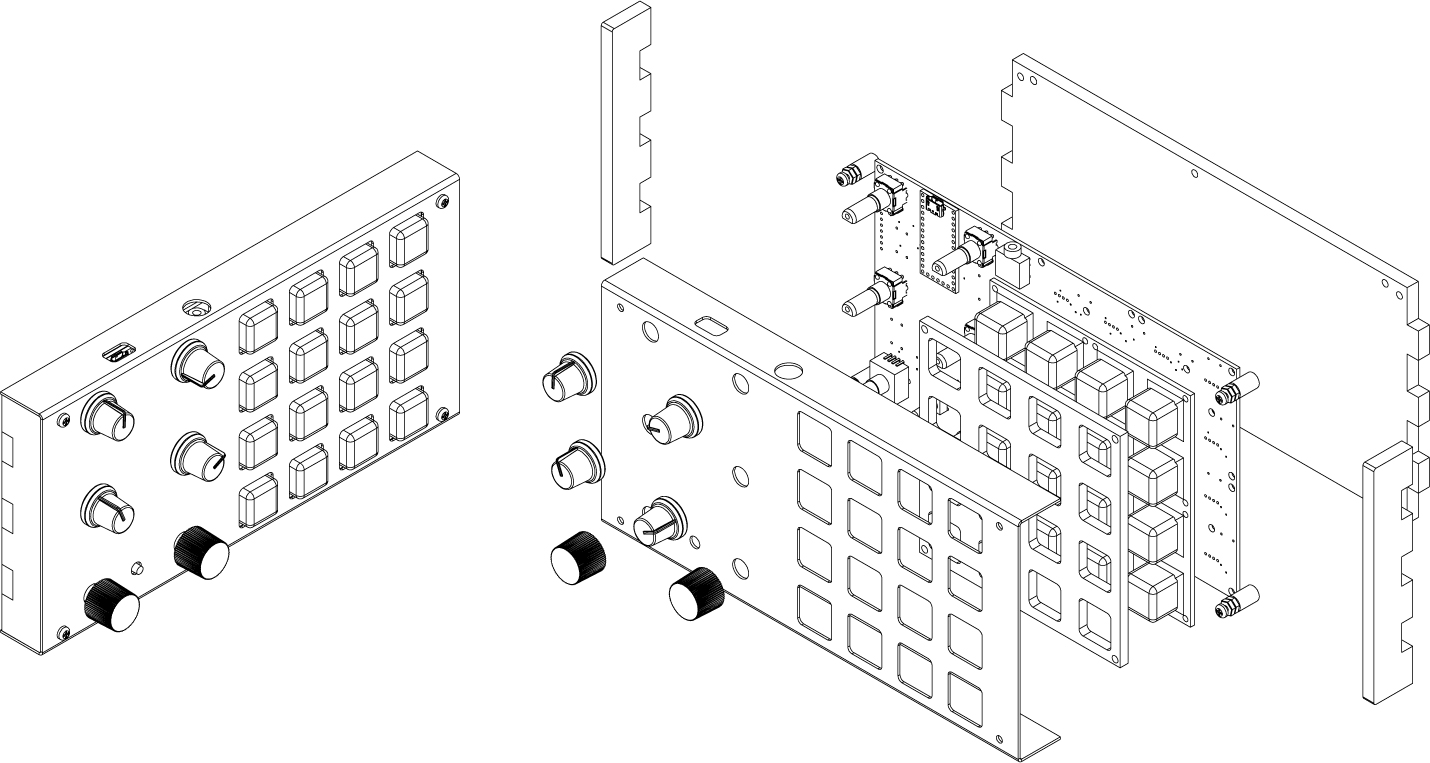
MIDI Elements
Bandcamp
SoundCloud
GitHub
LinkedIn
Instagram
Mastodon
Category:
Technology
Berlin Atonal 2018 – Reverse Osmosis (Mika Oki)
December 10, 2018
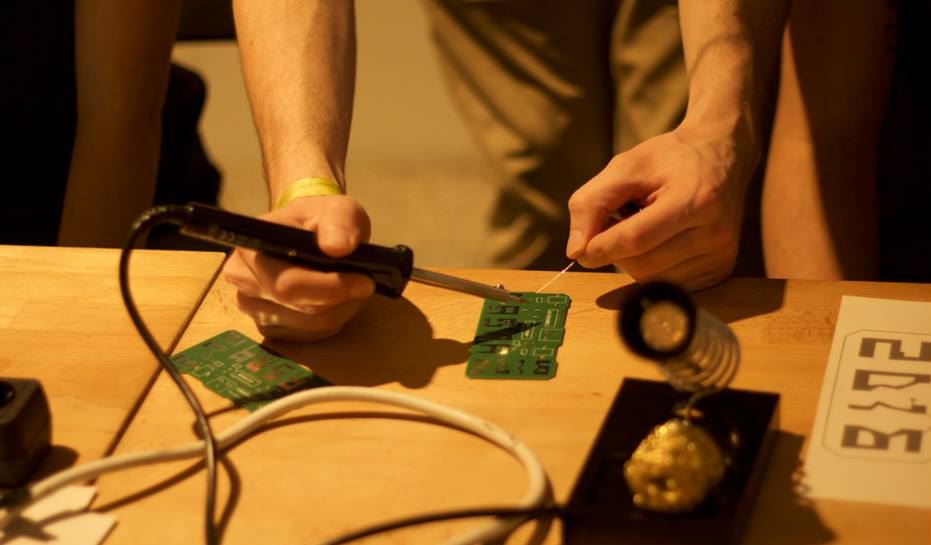
Fasma Festival 2017 – DIY Drum Machine (Teensy)
May 1, 2018
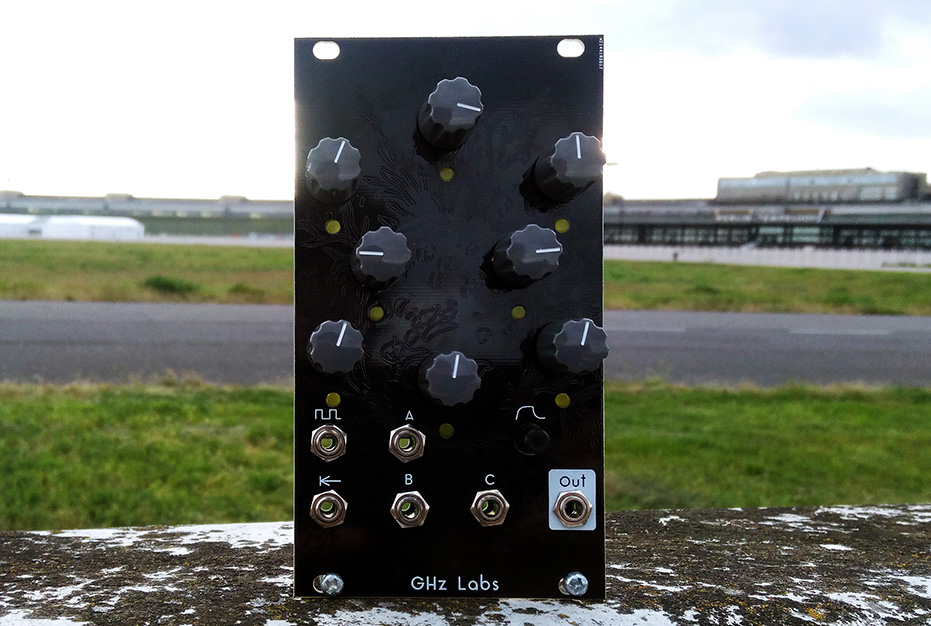
Envelope Generator – GHz Labs
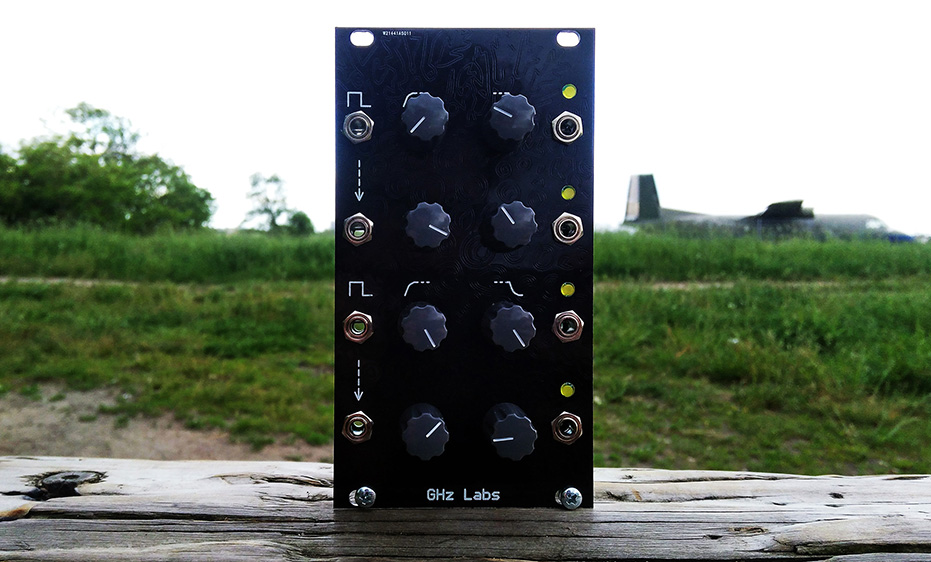
April 15, 2018
CV Sequencer – GHz Labs
April 15, 2018
Fasma 2016 Festival – DIY Synth
August 15, 2016
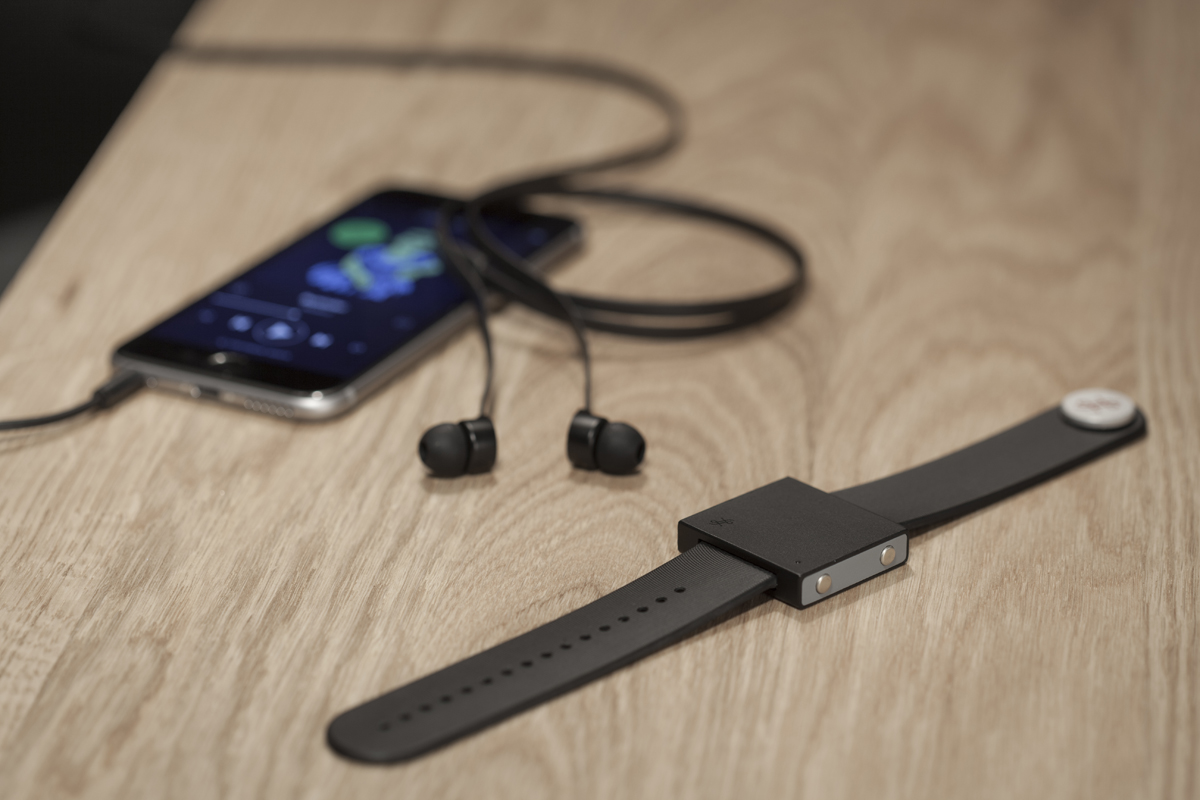
The Basslet
June 21, 2016
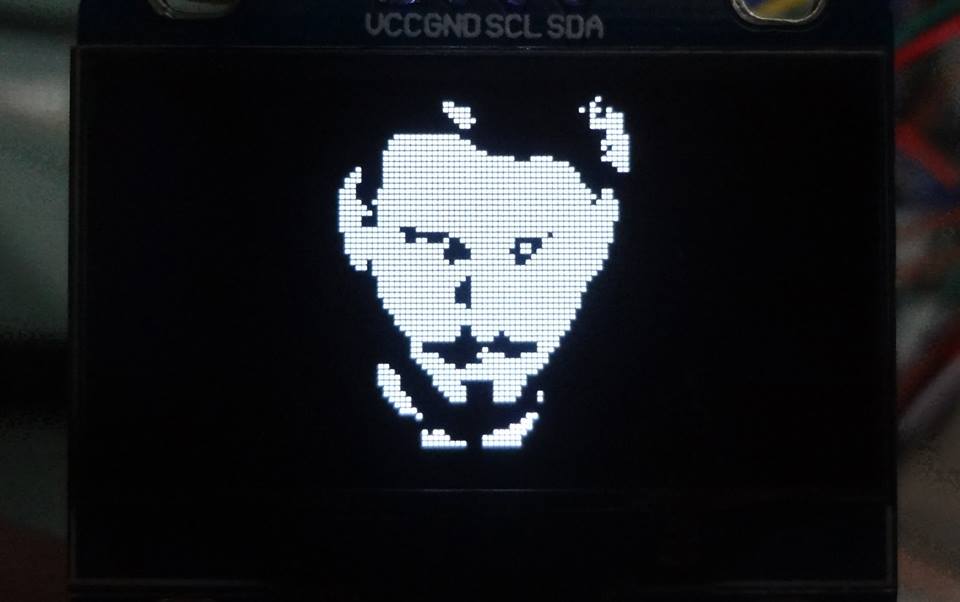
SH1106 OLEDs
August 3, 2015
Digital Warrior – The final battle
February 3, 2015
1
2
3
…
7
»